
Blog
How to Apply Tile Grout

How to apply tile grout correctly?
Firstly ensure that the tile joints are cleaned and free from dust and oil. prepare the grout according to the instruction on pack, then fill the joints completely with a rubber grout float, remove excess material diagonally, and clean the tile surface at the correct stage. Following the correct application method helps create neat, uniform and durable tile joints.
For homeowners, tile installers, contractors and architects in India, Dinobond Tile Grout can be considered as part of a complete tile installation system. Proper preparation and application are just as important as selecting the right grout or tile joint filling.
What You Need Before Applying Tile Grout
Before you begin, keep the following tools and materials ready:
- Dinobond Tile Grout
- Clean mixing container
- Measuring container
- Rubber grout float
- Clean water
- Damp sponge
- Mixing tool
- Gloves and suitable protective equipment
Make sure the tile adhesive has reached the required curing stage before grouting. The joints should be clean, free from dust, loose material and excess adhesive. Ideally, sufficient joint depth should remain available for the grout to bond properly.
How to Apply Tile Grout Step by Step
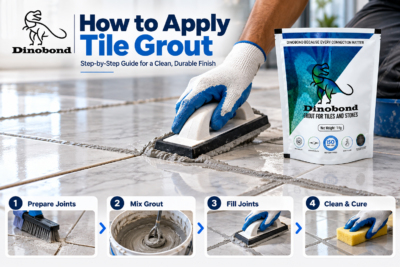
- Prepare the Tile Joints
First, inspect the complete tiled surface. Remove tile spacers, dust, loose particles and excess adhesive or Cement from the joints. The tiles should be firmly fixed and the adhesive should be adequately cured before you begin.
If you are working with porous or sensitive tiles, test the grout on a small concealed area first. Certain tile and stone surfaces can be affected by pigmented grout, so compatibility should be checked before full application.
- Mix the Grout Correctly
Follow the water-to-powder ratio specified on the Dinobond product packaging. Add the required grout powder in clean water and mix using a low-speed mixer until you achieve a smooth, uniform Paste.
- Fill the Tile Joints
With the help of rubber grout float, press the prepared grout firmly into the joints. Hold the float at an angle and move it diagonally across the joints so the grout completely fills the available space.
Avoid simply spreading grout over the surface. The objective is to pack the joints fully and avoid gaps or voids. Remove excess grout from the tile surface with the edge of the float while the material is still workable.
- Clean the Tile Surface
Allow the grout to reach the appropriate cleaning stage. Then use a clean, damp sponge to remove grout residue from the tile surface.
Work diagonally across the joints rather than dragging the sponge directly along them. Rinse the sponge frequently and avoid excessive water, because too much water during cleaning can affect grout colour and may weaken the finished joint.
- Allow Proper Curing
After cleaning, allow the grout to cure according to the Dinobond product’s technical instructions. Avoid unnecessary traffic, water exposure or aggressive cleaning during the curing period.
Why Choose Dinobond Tile Grout?
Dinobond Tile Grout is positioned as part of Dinobond’s complete tile-fixing solution for residential and commercial applications. We choose Dinobond because it available in many shades which enhance the beauty of floor and wall and give strongness due to best quality raw material used to manufacture. .
For projects across India, homeowners, contractors, builders and tile professionals should select grout according to the tile Color, joint width, application area and expected service conditions.
Quick Answer: How to Apply Tile Grout
Clean the joints → prepare the grout → fill joints with a rubber float → remove excess diagonally → clean with a damp sponge → allow the grout to cure properly.
Correct technique is essential for achieving consistent grout joints and a professional-looking tile installation.
Frequently Asked Questions
- How long should I wait before applying tile grout?
Wait approximately 24 hours or until the tile adhesive has adequately hardened according to its manufacturer’s instructions. Grouting too early can interfere with the installation.
- Can I apply grout directly over dirty joints?
No. Tile joints should be clean and free from dust, loose material, standing water and excess adhesive or cement before grouting.
- How do I apply grout between floor tiles?
Spread the prepared grout with the help of rubber float, pressing it diagonally across the joints to fill them completely. Remove excess grout before cleaning the surface.
- How much tile grout do I need?
Grout quantity depends mainly on tile size, tile thickness, joint width and the surface being grouted. Therefore, coverage should be calculated using the specific product’s coverage information.
- Can tile grout be used in bathrooms?
The appropriate polymer base grout can be selected for bathroom applications, but suitability depends on the specific product, tile type, joint conditions and exposure. Always check the Dinobond product’s technical specifications before application.
- How can I get a professional tile grout finish?
Use the correct mixing ratio, completely fill the joints, remove excess grout diagonally, clean at the recommended stage and avoid excessive water during cleaning. Consistent application and cleaning techniques help achieve a more uniform finish.
How to Apply Tile Grout
